XUpload 2.1 Programmer's Manual
http://www.aspupload.com/xupload.htmlWhat is XUpload?Copyright (c) 1999 - 2001 Persits Software, Inc.
All Rights Reserved.
XUpload 2.1 is a client-side ActiveX control for uploading files from a user's machine to the Web server using the RFC1867 standard. The purpose of XUpload is to overcome numerous limitations of purely browser-based upload solutions. With XUpload, users can upload files to the server from a web page viewed by Microsoft Internet Explorer, from a custom application built with Visual Basic, Visual C++ or any other platform supporting ActiveX, or directly from File Explorer (see section Using XUpload as a Shell Extension.)What's New in XUpload 2.1To upload files to the server, XUpload invokes a server-side upload component such as AspUpload from Persits Software, Inc. All the samples in this manual assume that your web server has this component installed. A free trial copy of the AspUpload component can be downloaded from http://www.aspupload.com.
Being an ActiveX control, XUpload can only be used with containers supporting ActiveX. XUpload will not work under Netscape browsers as they currently do not support ActiveX. XUpload can only be used on Win32 platforms such as Windows 95/98/NT/2000. It will not work on Macintosh or Linux machines.
The XUpload 2.1 control used the Microsoft Internet Explorer 4.0 WinInet API. Therefore, XUpload requires that Microsoft Internet Explorer 4.0+ be installed, even if the control is used in containers other than IE.
The following new features have beed added to XUpload 2.1:Limitations of Form-based Uploading
- IncludeDateInfo property added. Date preservation can be switched off by setting this property to False. This is useful when XUpload is used with a server component other than AspUpload.
- Stop method added. Uploading can now be aborted programmatically.
- NTLM (Challenge/Response) Authentication support. Previous versions of XUpload had problems accessing upload scripts protected by NTLM. XUpload 2.1 is free of this limitation.
- Improved Basic Authentication support. XUpload 2.1 displays the standard IE login dialog instead of a custom one.
- Improved RFC-1867 compliance. Content-Type and Content-Length headers are explicilty set.
- Version property added which enables programmatic access to current version information.
- Several minor bugs fixed.
RFC1867-compliant browsers such as IE 4.0+ or Netscape 3.0+ perform file uploads using an HTML form with the attributes <FORM METHOD="POST" ENCTYPE="multipart/form-data">. This form must contain one or more items of the type <INPUT TYPE=FILE>. The browsers display such items as regular text boxes with the button "Browse..." next to them. Clicking the Browse button invokes the standard Choose File dialog box which allows the user to select a file for uploading. The limitations of form-based uploading are:Getting ReadyAll these limitations can be overcome with the help of the Persits Software, Inc. XUpload control.
- The "Choose File" dialog shown by a browser does not allow multiple selections;
- To upload multiple files at once, the HTML form must contain multiple <INPUT TYPE=FILE> boxes, each file must be selected individually;
- A folder cannot be selected for uploading.
- Default values for the file names cannot be pre-set (the VALUE attribute is ignored for <INPUT TYPE=FILE> tags);
- There is no progress bar;
- There is no way to set a default directory to select the files from;
- There is no way to specify file filters to be displayed in the Files of type box of a "Choose File" dialog;
- There is no way to put a limit on the size and number of files being uploaded before uploading begins;
- There is no way to force users to select files with certain extensions only;
- Aside from the file path, browsers do not send any information about the files being uploaded, so the file dates cannot be preserved.
- Uploading cannot be performed in a batch-like process.
The XUpload setup program attempts to create the /XUpload virtusl directory on top of the ...\XUpload\Samples folder of the installation. Make sure the virtual directory has been successfully created. If necessary, re-create it. You must also have the AspUpload component installed and registered on your machine. This upload component can be downloaded from www.aspupload.com.Using XUpload with Internet Explorer
When used with IE, the XUpload control runs inside an HTML page on a client machine. The HTML page must reference the control using the <OBJECT> tag, as follows:Browser Redirection<OBJECT WIDTH=500 HEIGHT=200
ID="UploadCtl"
CLASSID="CLSID:E87F6C8E-16C0-11D3-BEF7-009027438003"
CODEBASE="XUpload.ocx">
...
</OBJECT>Generally, XUpload does not need to be registered on the Web server (because it runs on client machines) but it does need to be placed in a virtual directory together with HTML pages it is referenced by so that the browser, after coming across the <OBJECT> tag, can download the XUpload.ocx file to the client machine and register it there.
The WIDTH and HEIGHT attributes of the <OBJECT> tag define the size of the control inside the page. The ID attribute identifies the XUpload object so that it can be used by client-side VB Script. The CLASSID attribute specifies the XUpload control's globally unique identifier (GUID) which the browser uses to create an instance of the control. The CODEBASE attribute specifies where the file XUpload.ocx resides relative to the current HTML page.
Fire up your browser and open the URL http://localhost/xupload/simple.htm. Unless XUpload.ocx was previously registered on your machine, you should see a dialog box similar to this one:

The file XUpload.ocx was digitally signed to provide proof to the user that the control he is about to install on his machine really came from Persits Software, Inc., and that it was not tempered with during transmission. Click "Yes" to have the browser install the control on your computer.
You should now be able to see the control inside your browser. It looks like a regular Win32 list control with two columns, Files and Size. Right-click anywhere inside the control. A pop-up menu appears with four menu items, "Select Files", "Select Folder", "Remove All" and "Upload".
The Remove All and Upload items are grayed out as there is no files selected. Choose Select Files to invoke the standard "Select Files" dialog box. Choose a few files and click Ok. The selected files appear in XUpload's list control with their respective icons and size information. We can now remove any or all files from the list by highlighting the appropriate items, right-clicking inside the control and choosing Remove or Remove All. We can also sort the items alphabetically or by size by clicking on the Files or Size headers, respectively.
At the very minimum, you must supply values for two XUpload properties: Server and Script. The Server property specifies the address of a destination web server, such as "www.persits.com" or "192.168.112.221". The Script property is the path to an upload script on that server, such as "/upload/myuploadscript.asp". These two properties together serve the same purpose as the ACTION attribute of an HTML POST form.
NOTE: All the XUpload samples use the value "localhost" for the Server property and "/xupload/<script name>.asp" for the Script property. Change these values as necessary.
The properties of an ActiveX control can be specified using <PARAM> tags placed between the <OBJECT ...> and </OBJECT> tags, for example:
<OBJECT WIDTH=500 HEIGHT=200
ID="UploadCtl" CLASSID="CLSID:E87F6C8E-16C0-11D3-BEF7-009027438003" CODEBASE="XUpload.ocx">
<PARAM NAME="Server" VALUE="localhost">
<PARAM NAME="Script" VALUE="/xupload/simple.asp">
</OBJECT>This sample uses the upload script Simple.asp included with the XUpload control. This script saves uploaded files in the "c:\Upload" directory, so you should make sure this directory exists or edit the script to specify a different directory.
Select a few files again and choose "Upload". A dialog box with two progress bars appears. Once the upload is complete, a message box titled "Reply from Server" pops up:
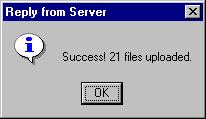
The text inside the message box came directly from the server and was generated by our upload script. We will see shortly how to make XUpload redirect the browser to another page upon the completion of an upload.
XUpload can be configured not to display the Reply from Server message box by setting the ViewServerReply property to False as follows:
<PARAM NAME="ViewServerReply" VALUE="False">
If you choose to do so your application may need to provide some other means to report server replies to the user, such as handling the ServerReply event (see section Handling Events.)
It would be much more intuitive for the user to have the browser open a different web page upon the completion of an upload that would display the upload results. XUpload 2.0+ is capable of doing that. To achive that effect, two ASP scripts are necessary: the first one works as a regular upload script, and the second does nothing but display the HTML output generated by the first script. The following additional parameters (besides the required Server and Script) configure XUpload to perform the redirection:<PARAM NAME="Redirect" VALUE="True">
<PARAM NAME="RedirectURL" VALUE="http://localhost/xupload/showreply.asp">The Redirect propery, if set to True, instructs XUpload not to display the HTML stream received from the upload script. Instead, XUpload POSTs the upload results to the URL specifed by the RedirectURL parameter, in the following format:
XUPLOADREPLY=<URL-encoded results>
Therefore, the script showreply.asp can be as simple as this single line of ASP code:
<% Response.Write Request.Form("XUPLOADREPLY") %>
The redirection technique is demonstrated by the sample files Redirect.htm, Draddrop.htm, Directories.htm, FormItems.htm and Buttons.htm. It is also demonstrated by the XUpload live demo at http://www.aspupload.com/xupload/livedemo.html.Configuring Select Files for Uploading DialogNote: if the Redirect property is set to True, the ViewServerReply property will be ignored and assumed False.
An important advantage of XUpload over a purely browser-based solution is being able to specify the "Select Files" dialog's default directory and file filters. The corresponding properties are Directory and Filter. The usage of the Directory property is straightforward:Setting Limits on Files Being Uploaded<PARAM NAME="Directory" VALUE="c:\My Documents\Spreadsheets">
The Filter property accepts a list of pairs separated by the pipe character ( | ). Each pair defines a verbal description for a filter and the filter itself which may contain one or more wildcards separated by a semicolon (;). The two values in the pair are also separated by the pipe character. For example,
<PARAM NAME="Filter" VALUE="Images (.gif;.jpg)|*.gif;*.jpg|Documents (.doc)|*.doc|All Files|*.*">
Here we specify three filters. The first filter has the verbal description "Images (.gif;.jpg)" and consists of two wildcards, *.gif and *.jpg. The second filter has the description "Documents (.doc)" and is defined by the wildcard *.doc. The third filter is "All Files" with the wildcard *.*.
XUpload enables you to impose certain restrictions on the files being uploaded, so that the files not meeting the restrictions are rejected before an upload begins. The restrictions are set via the propteries MaxFileCount, MaxFileSize, MaxTotalSize and Extensions. The MaxFileCount property, if set to a non-zero value, limits the total number of files selected for uploading. The MaxFileSize property, if set to a non-zero value, places a limit on the size of individual files (in bytes). The MaxTotalSize property, if set to a non-zero value, sets a limit on the total size of files selected for uploading (in bytes). These three properties are 0 by default. The Extensions property can be used to specify a list of acceptable file extensions. For example,Populating File List with Default Values<PARAM NAME="MaxFileSize" VALUE="50000">
<PARAM NAME="MaxTotalSize" VALUE="200000">
<PARAM NAME="MaxFileCount" VALUE="10">
<PARAM NAME="Extensions" VALUE="gif,doc,jpg">The Extensions restriction is enforced at the time of adding a file to the list. The other three restrictions are enforced at the time when XUpload is instructed to start an upload (via the user interface or Upload method.) An attempt to upload a set of files not meeting the MaxXXX restrictions results in an error message being displayed by the control.
XUpload can be configured to populate its file list automatically upon loading. This is done via tags of the form <PARAM NAME="FileN"> where N is a number greater than 0. When XUpload loads it attempts to retrieve the PARAMs File1, File2, File3, etc. until a break in the sequence is encountered, and uses the corresponding values to populate its file list. For example,Handling Basic Authentication and SSL<PARAM NAME="File1" VALUE="c:\My Documents\Spreadsheets\Bool1.xls">
<PARAM NAME="File2" VALUE="c:\My Documents\Spreadsheets\Book2.xls">
<PARAM NAME="File3" VALUE="c:\My Documents\Spreadsheets\Summary.xls">
When XUpload attempts to upload to a server protected by Basic Authentication, it displays a dialog box asking the user for his/her username and password which are then sent to the server. You can use the Username and Password properties to specify default credentials that will be used by XUpload. If these credentials are valid, XUpload will go ahead with uploading and no login dialog will be displayed. If the credentials are rejected by the server, XUpload will display the login dialog with the User Name and Password boxes populated with the values specified by the Username and Password properties. You may choose to disable the login dialog by setting the ShowLoginDialog properties to False. In that case XUpload will proceed with uploading even if the credentials specified by the Username/Password properties are invalid, so the upload may fail.Preserving Original "Last Modified" Timestamps of Uploaded FilesIf the server requires a Secure Socket Layer connection (SSL) you must set the SSL property to True, as follows:
<PARAM NAME="SSL" VALUE="True">
When browsers upload files to the server they do not send the "Last Modified" dates together with the files, but XUpload does. The control adds a custom header, X-Last-Date, to the standard "Content-Disposition" and "Content-Type" MIME headers used in form-based uploading. AspUpload 1.4+ uses this information to preserve the original dates of uploaded files.Using Client-Side VBScriptBeing a custom header, X-Last-Date makes a POST performed by XUpload incompatible with RFC-1867 specifications. If you use a server-side upload component other than AspUpload, you may experience problems uploading files. To disable the X-Last-Date header, set the property IncludeDateInfo to False (new in Version 2.1).
You may customize the appearance and behavior of XUpload on your Web page using client-side VBScript. The following code disables the control's popup menu and creates four buttons with the same functionality as the menu's items:Uploading Non-File Form Items
<SCRIPT LANGUAGE="VBScript">
Sub Select_OnClick
UploadCtl.Select
End SubSub Remove_OnClick
UploadCtl.RemoveHighlighted
End SubSub RemoveAll_OnClick
UploadCtl.RemoveAll
End SubSub Upload_OnClick
UploadCtl.Upload
End Sub
</SCRIPT><HTML><BODY>
<OBJECT WIDTH=500 HEIGHT=200
ID="UploadCtl" CLASSID="CLSID:E87F6C8E-16C0-11D3-BEF7-009027438003" CODEBASE="XUpload.ocx">
<PARAM NAME="EnablePopupMenu" VALUE="False">
</OBJECT>
<P>
<INPUT TYPE=BUTTON NAME="SELECT" VALUE="Select">
<INPUT TYPE=BUTTON NAME="REMOVE" VALUE="Remove">
<INPUT TYPE=BUTTON NAME="REMOVEALL" VALUE="Remove All">
<INPUT TYPE=BUTTON NAME="UPLOAD" VALUE="Upload"></BODY></HTML>
Another example of operating XUpload with VBScript can be found in the sample file Buttons.htm.
It is often necessary to upload additional information together with the files, such as a text description. In browser-based uploading, this is handled by adding non-file items to the HTML form, for example:Collecting Non-File Form Items with VBScript<FORM METHOD="POST" ENCTYPE="multipart/form-data" ACTION="UploadScript.asp">
File 1:<INPUT TYPE=FILE NAME="FILE1">
File 2:<INPUT TYPE=FILE NAME="FILE2">
Description:<INPUT TYPE=TEXT NAME="DESCR">
<INPUT TYPE=SUBMIT VALUE="Upload!">
</FORM>XUpload 2.1 is capable of collecting all non-file form items from an HTML form hosted on the same page and uploading these items along with files. The property HtmlForm is used to specify the name of the form, as follows:
<OBJECT ID="UploadCtl"
...
<PARAM NAME="HtmlForm" VALUE="MyForm">
</OBJECT><FORM NAME="MyForm">
<INPUT TYPE=TEXT NAME="Descr">
... other form items
</FORM>The sample file FormItems.htm demonstrates this feature.
An alternative way of specifying non-file form items is to call the method AddFormItem( name, value) with VB script. When the Upload button is clicked, our VB Script must collect data from the form items on the page and pass them to the XUpload control via the AddFormItem method, but first it needs to remove all the form items that might have been passed to the control by previous uploads. This is done by calling RemoveAllFormItems. Suppose our page contains the following form items besides the four buttons mentioned in the VB Script example above:Handling Events...
Description: <INPUT TYPE=TEXT NAME=DESCR><BR>
Save in Database? <INPUT TYPE=CHECKBOX NAME=YESNO><P>The Upload_OnClick subroutine now may look like this:
<SCRIPT LANGUAGE="VBScript">
...
Sub Upload_OnClick
UploadCtl.RemoveAllFormItems
If YESNO.Checked Then UploadCtl.AddFormItem "YESNO", "on"
UploadCtl.AddFormItem "DESCR", DESCR.Value
UploadCtl.Upload
End Sub
</SCRIPT>The sample file Buttons.htm demonstrates this technique.
If ASP is used on the server side, we cannot access the non-file form items using the Request.Form collection because of the special data format used in file uploading. AspUpload provides a Form collection of its own: Upload.Form("DESCR"). For more information on handling non-file form items, see AspUpload Manual.
XUpload fires events on every major occasion such as the beginning and end of an upload, addition and deletion of files, sorting, errors, etc. With the help of VBScript, your web page can handle some or all of the events. The following example replaces the default Reply from Server message by handling the UploadCtl_ServerReply event:Using XUpload in VB
<SCRIPT LANGUAGE="VBScript">
Sub UploadCtl_ServerReply(Reply)
MsgBox("The reply form the server was: " & chr(13) & chr(10) & Reply)
End Sub
</SCRIPT><HTML>
<BODY><OBJECT WIDTH=500 HEIGHT=200
ID="UploadCtl" CLASSID="CLSID:E87F6C8E-16C0-11D3-BEF7-009027438003" CODEBASE="XUpload.ocx">
<PARAM NAME="ViewServerReply" VALUE="False">
<PARAM NAME="Server" VALUE="localhost">
<PARAM NAME="Script" VALUE="/xupload/uploadscript.asp">
</OBJECT></BODY>
</HTML>Another example of using XUpload events can be found in the sample file Progress.htm. It demonstrates how to build a custom DHTML-based progress bar by tapping into the UploadCtl_UploadProgress and UploadCtl_WaitingForReply events.
For the complete list of events supported by XUpload, see Object Reference below.
Run Visual Basic, open or create a project, and go to Projects/Components. Check the box next to "Persits Software XUpload Control", then click OK. The control's icon (blue dotted square) appears on the VB Toolbox. Use XUpload as you would any VB control. XUpload's properties can be set using VB's standard Properties panel, or XUpload's custom property sheet. The latter can be invoked by right-clicking on the control and selecting "Properties" from the context menu or double-clicking the word (Custom) in the VB Properties panel.
The property sheet can also be invoked programmatically by calling the DisplayProperties method.Using XUpload as a Server Component
XUpload can work as a server component that can be used in an ASP environment. The following sample ASP code uploads two files from one server (where it is installed) to another (where file capture script is installed):Using XUpload to Upload Files Directly from Windows File Explorer
<%
Set XUpload = Server.CreateObject("Persits.XUpload")
XUpload.Server = "192.168.1.15"
XUpload.Script = "/xupload/uploadscript.asp"' Specify files to upload
XUpload.AddFile "d:\somefile.txt"
XUpload.AddFile "d:\about.txt"' Perform the upload
XUpload.Upload' Display the reply
Response.Write "Reply from the Server was: " & XUpload.ServerReply
%>A more detailed example can be found in the sample file ServerComponent.asp.
NOTE: The XUpload methods Select, Remove, RemoveHighlighted, and DisplayProperties involve XUpload's GUI and may not be called when the control is used as a server component. The methods AddFile, AddFolder, RemoveAll, Upload, AddFormItem, RemoveAllFormItems and MakeHttpRequest are allowed. For more information on the MakeHttpRequest, see section Complimentary Features.
A shell extension is a Win32 application that, among other things, adds a custom menu item to the context menu displayed by File Explorer when a user right-clicks on a file or selection of files. When the user selects this menu item the shell extension (or some other application) opens up and performs a certain task on the selected file(s). For example, WinZip and Norton AntiVirus work as shell extensions.Complimentary FeaturesXUpload is also capable of acting as a shell extension which allows you to select files for uploading directly from Windows File Explorer. To register XUpload as an active shell extension, execute the following command from the MS DOS prompt or Start/Run box:
c:\path\XUploadShell.exe -RegServer
This command is silent and generates no feedback to the user. Once this is done, you can fire up File Explorer, select a few files and right-click on them. The context menu will now look similar to this:
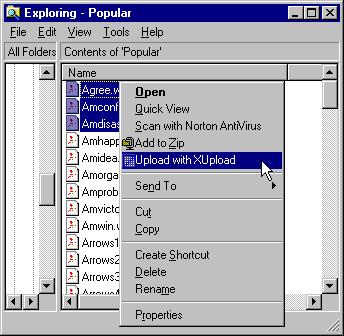
When you select the "Upload with XUpload" item, a dialog-based application titled "XUpload Shell Application" comes up which contains the XUpload control populated with the selected files, and the buttons "Select", "Remove", "Remove All", "Upload", "Settings" and "Close". This application is XUploadShell.exe which we have just used to register the shell extension.
When you click on "Settings", the XUpload property sheet comes up which allows you to specify your upload settings. When you exit the dialog your settings are saved in the system registry under the key HKEY_LOCAL_MACHINE\Software\Persits Software\XUpload\Shell Extension and used the next time you invoke the extension. To upload the selected files, simply click on the Upload button or select "Upload" from the XUpload control's popup menu..
To remove the XUpload Shell Extension from your system, execute the command
c:\path\XUploadShell.exe -UnregServer
Unregistering the shell extension does not affect the XUpload control.
XUpload's MakeHttpRequest method allows your ASP or VB application to perform arbitrary HTTP requests such as POST and GET. The method returns the output returned from the server as a result of the request. The method can optionally save the output in a file.Object ReferenceThe following code sample performs a POST to a remote server and returns the result to the user:
<%
Set XUpload = Server.CreateObject("Persits.XUpload")
XUpload.Server = "www.myserver.com"
XUpload.Script = "/mydir/myscript.asp"
Response.Write "Response from Server: " &_
XUpload.MakeHttpRequest("POST", "param1=value1¶m2=value+2")
%>The following code sample pulls a JPG file from a remote server and saves it in a local directory:
<%
Set XUpload = Server.CreateObject("Persits.XUpload")
XUpload.Server = "192.168.1.1"
XUpload.Script = "/somedir/somefile.jpg"
XUpload.MakeHttpRequest "GET", "", "c:\localdir\somefile.jpg"
%>See section Object Reference for the complete description of the MakeHttpRequest.
XUpload PropertiesCommon WinInet Errors and Trouble-shooting
Property Name Type (Access, Default value) Comments Server String (RW) Specifies the address of the server where the files are uploaded to. Script String (RW) Specifies the upload script on the Server. SSL Boolean (RW, False) Specifies whether the server expects a SSL connection. Port Integer (RW, 0) Specifies the TCP//IP port on the server to connect to. If not specified, ports 80 and 443 are used for regular and SSL connections, respectively. Username String (RW) Specifies the default username in case basic authentication is enabled on the server. Password String (RW) Specifies the default password in case basic authentication is enabled on the server. ShowLoginDialog Boolean (RW, True) Specifies whether a login dialog box should be shown by XUpload if basic authentication is enabled on the server. If this property is set to False, an upload may fail in case Username/Password are invalid. ShowProgress Boolean (RW, True) Specifies whether the progress bar should be displayed. EnablePopupMenu Boolean (RW, True) Specifies whether a popup menu should be displayed if the control is right-clicked. If an application chooses to set this property to False, it must provide some other means to invoke the Select, Remove and Upload commands. ViewServerReply Boolean (RW, True) Specifies whether XUpload should display the Reply from Server message box with the text returned by the upload script. Directory String (RW) Specifies the default directory for the Select Files and Select Folder dialogs. Filter String (RW) Specified the file type filters for the Select Files dialog in the form of a list of pairs separated by the pipe character ( | ). Each pair specifies the verbal description of a filter and the filter itself as a list of semicolon-separated wildcards. The elements in a pair are separated by the pipe character as well. For example, "Images (.gif;.jpg)|*.gif;*.jpg|Documents (.doc)|*.doc"
ShowErrors Boolean (RW, True) Specifies whether XUpload should display error messages. If set to False, no errors will be reported. In this case an application may need to handle the Error event. MaxFileCount Long (RW, 0) Specifies the maximum allowed number of files. A zero value indicates no limits. MaxFileSize Long (RW, 0) Specifies the maximum allowed size of individual files. A zero value indicates no limits. MaxTotalSize Long (RW, 0) Specifies the maximum allowed total size of files. A zero value indicates no limits. Extensions String (RW) Specifies a comma-separated list of allowed file extensions. An empty string indicates no limitations. SelectedFiles Files Collection (R) Returns a collection of File objects. Each object represents a file on the control's list. The File object supports the following read-only properties: Path, Size, Index (0-based) and Selected (indicates whether the file is highlighted in the list.) TotalFileSize Long (R) Returns the total size of selected files. FileCount Long (R) Returns the number of selected files ServerReply String (R) Returns a reply from server once an upload is complete. HtmlForm String (RW) Specifies the HTML form name hosted on the same page. XUpload will automatically scan this form and upload all non-file items from it along with files. Redirect Boolean (RW, False) Specifies whether XUpload should redirect the browser to the URL specified by RedirectURL upon the completion of an upload. Only effective when XUpload is hosted by IE, but not VB. If Redirect is True, XUpload will POST to the specified URL the results generated by the upload script in the format XUPLOADREPLY=<results>
RedirectURL String (RW) See comments to Redirect. This URL must point to an ASP script that, at a minimum, must contain the following code: <% Response.Write Request.Form("XUPLOADREPLY") %>
Proxy String (RW) Specifies the proxy address when XUpload is used as a server component, such as XUpload.Proxy = "http://myproxy:80"
ProxyBypass String (RW) Specifies the proxy bypass parameter when XUpload is used as a server component. ProxyUsername String (RW) Specifies the proxy username if the proxy requires authentication. ProxyPassword String (RW) Specifies the proxy password if the proxy requires authentication. IncludeDateInfo Boolean (RW) True by default. If set to False, switches the date preservation feature off. This is useful when XUpload is used with an upload component other than AspUpload. Expires Date (R) Returns the control's expiration date. Returns 9/9/9999 if this is a registered copy. If the expiration date cannot be determined returns 0 (displayed as "12:00 AM".) Version String (R) Returns a string representing the current version of this control, for example "2.1.0.0". XUpload Methods
Method Name Arguments Comments Upload N/A Has the same effect as choosing "Upload" from the popup menu. Causes the upload process to begin. Select N/A Has the same effect as choosing "Select" from the popup menu. Causes the Select Files dialog to come up. This method must not be called if XUpload is used as a server component.
SelectFolder N/A Has the same effect as choosing "Select Folder" from the popup menu. Causes the Select Folder dialog to come up. This method must not be called if XUpload is used as a server component.
Remove Index As Integer Removes a file with the zero-based index specified by Index from the file list. This method must not be called if XUpload is used as a server component.
RemoveHighlighted N/A Has the same effect as choosing "Remove" from the popup menu. Causes all highlighted items on the file list to be removed. This method must not be called if XUpload is used as a server component.
RemoveAll N/A Invokes the Remove All command. Clears the file list. AddFile Path As String Adds a new file to the file list. AddFolder Path As String
Optional Recursive = FalseAdds all files contained in Folder to the file list. If Recursive is set to True, also adds all files in sub-folders recursively. DisplayProperties N/A Causes the XUpload property sheet to come up. This method must not be called if XUpload is used as a server component.
Stop N/A Programmatically stops an upload. Calling this method is equivalent to pressing the Stop button on the progress bar. AddFormItem Name As String
Value As StringUse this method to simulate non-file form items for an upload. See file FormItems.htm for code sample. RemoveAllFormItems N/A Removes all items added by AddFormItem AddCookie URL As String
Name As String
Data As StringCreates a cookie associated with the specified URL. Name is a string that contains the name to associate with the cookie data. If this parameter is empty, no name is associated with the cookie. Data is the actual data to associate with the URL. MakeHttpRequest Method As String
Params As String
Optional Path = ""
Optional UserAgent = "XUpload"
Optional Headers = ""Returns: String
Performs an HTTP request using the properties Server, Script, Port, Username and Password. Method specifies the request type such as "GET" or "POST". Params specify the data to be sent to the server. Leave this parameter empty if Method is "GET". Path, if not empty, instructs the method to save the output in a file. UserAgent and Headers, if not empty, specify additional information to be sent to the server. Returns the output received from the server.
XUpload Events
Name Arguments Comments Sort Column As Integer Fired when the file list is sorted. If Column is 0 the sorting is by File name, otherwise the sorting is by size. AddFiles Number As Integer,
Size As LongFires when files are added to the file list. Number specifies the number of files being added, Size specifies total size. RemoveFiles Number As Integer,
Size As LongFires when files are removed from the file list. Number specifies the number of files being removed, Size specifies total size. UploadStart N/A Fires when the upload process starts. UploadFinish N/A Fires when the upload process ends, but before a reply from the server is received. UploadProgress FilePercent As Integer,
OverallPercent As IntegerFires to indicate the upload progress. FilePercent is an integer between 0 and 100 that specifies the progress of an individual file. OverallPercent is a integer between 0 and 100 that specifies the overall progress. WaitingForReply N/A Fires right after all files are uploaded but before a reply from the server is received. UploadFile FileName As String Fires right after a file is opened to be uploaded. FileName specifies the file's full path. ServerReply Reply As String Fires when a reply is received from the server. Reply specifies the text received. Error Code As Long,
Description As StringFires when an error occurs. Code can be one of the following values: 1 - Too many files selected by Select Files dialog.
2 - Selecting files failed.
3 - Server not specified.
4 - Script not specified.
5 - Opening HTTP session failed.
6 - Error connecting to the server.
7 - Opening HTTP request failed.
8 - Wrong file extension.
9 - Cannot open file.
10 - Sending HTTP request failed.
11 - Cannot open file during uploading.
12 - Error reading file.
13 - Error sending data.
14 - File number exceeds MaxFileCount.
15 - Reserved.
16 - File size exceeds MaxFileSize.
17 - Total file size exceeds MaxTotalSize.
18 - Control expired.
Error: 12029Where to Get Help
Meaning: "Cannot connect."
Solution: Make sure the Server and Script parameters are correct and the network connection is functioning.Error: 12030
Meaning: "Connection Aborted."
Solution: This error usually means that XUpload's SSL parameter does match the SSL settings of the server. Check whether the server requires an SSL connection, and if so set the SSL property to True. This error may also mean that the specified script cannot be found on the server.For more technical support information, visit our searchable database of articles at SUPPORT.PERSITS.COM.
For more information on XUpload, including licensing, please visit the web site www.aspupload.com. For general and sales info, please write to info@aspupload.com. For technical support, please write to support@aspupload.com.